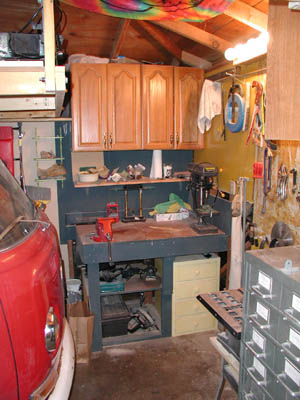
The inside of the garage wasn't very useful. I keep my bus parked in there anyway,
so there goes most of the room, but there's about 8-10 feet in front that needs to
be used for a workshop. There had been a high, rather deep single bench running the
width of the garage along the east wall, and it was lit by a single bare bulb near
the center of the garage. There was very little storage space, no cabinets or useful
shelves. With that setup, I never really spent much time in the garage or worked
out there, because it just wasn't a good place for it. Besides, at the time the Arizona
Room was still there, and that room served as a workshop.
One day I just got into
it, tore out the old bench and cleaned the space up to see what I had. I then used
the wood from the original bench along with some other scraps I had and built a much
more functional, smaller bench along the north wall that had shelves, a spot for
a set of drawers, and a mounted vise. It's very solid, and opens up much of the available
space for other uses. I have moved the heavy punch-card cabinet out there for parts
and tool storage. I mounted cabinets which were removed from the old laundry room
for additional storage. I re-hung the pegboard that was in there, and many of my
hand tools hang on it. The old light bar from the master bath provides a lot of much-needed
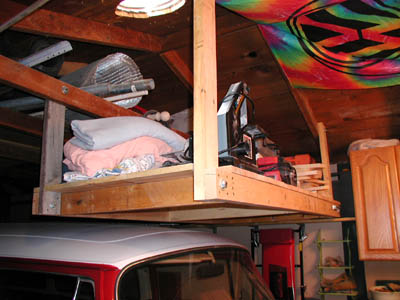
light. I have more recently installed a heavy "shelf" that hangs from the
ceiling just above the front of the bus for more storage. It's really a small space,
and I have to make the most of what I have, which means keeping the place organized..
Unfortunately, I have no pictures of what the garage looked like before. But
it was dismal. I built that smaller bench, mounted the cabinets, relocated
the pegboard, installed the light bar, and even painted part of the garage. The
right picture shows a more recent addition (April 2002), the large, heavy-duty suspended
shelf that sits just above the front portion of the van when parked. I planned it
so that it clears the top of the van by about 1", and also so that I don't bonk
my head on the shelf when the van isn't there. You can also see the hole in the
roof where I installed one of those 'whirlybird' vents some time ago. The Grateful
Dead/VW sheet on the ceiling was a gift from James when he visited in February.
This project is really a series of smaller, related projects....
When we moved
in, the water heater was sitting outside, unprotected, just outside the back door.
It was a new water heater; one of my conditions before agreeing on a contract to
buy the house. But it was just really ugly sitting there. Also, the plumbing had
been converted to copper at some point, but the installer didn't want to bother removing
all of the original steel pipe, so much of the new copper was run on the outside
of the walls, then into the attic under the eaves. We always thought this was quite
tacky. Also, the plumbing that was run in the attic was a tangle of looping pipe
that made moving around the attic very difficult. They also used "red"
pipe, which is the thin-walled copper tubing that can easily be bent with a pipe
bender. This isn't too bad, but they also used a lot of compression fittings
rather than sweat fittings, which is a real bad idea in an enclosed space. Leaks
were inevitable.
So my main objective was to re-route all of the poorly-done
copper pipes. While I was at it, I may as well relocate the water heater back into
the house where it belongs. The original vent pipe was still there in the attic,
so I know exactly where the water heater was originally; in a corner of the laundry
room opposite the washer and dryer. But I also didn't want this ugly thing out in
the open in my house, so I decided to build an enclosure for the water heater. I
designed it and planned it out, but...
Attic Access and Ceiling
Repair
The new enclosure would partially block the tiny attic access panel.
So, I had to also relocate the attic access. One of the things I had bought right
away when I bought the house was one of those pull-down attic stairs. It had been
sitting in the second bedroom, still in it's box all this time. The time had come
to finally install it.
Another thing: when we first moved in, it looked like the
ceiling in the laundry room was kind of falling down. It wasn't really caving
in, but one of the original joists running the length of the laundry room had warped
severely over time, making the ceiling bow down considerably. Since I was going to
make a big hole in the ceiling for the stairs anyway, I might as well fix this at
the same time. This was also one of the joists that the new stairs needed to be adjacent
to, so in order for the stairs' frame to be mounted horizontally and flush with the
ceiling, the joist had to be fixed.
Attic Stairs
For the
stairs, one of the joists had to be cut and braced. I removed about half of the ceiling
in the laundry room, and cut the joist. For the one that was warped, I drew a line
on it where I wanted the ceiling to hang, and simply cut it down with my circular
saw. It was at this point that the cabinets on the wall were removed. Some of them
ended up in Ray's garage, one in my garage, and the rest were discarded. After carefully
following the installation instructions on the stairs, I now had a much larger access
to the attic, which would make the other related projects much easier. The ceiling
was re-hung, patched and painted.
Water Heater Enclosure Frame
For
the water heater enclosure, one of the base cabinets had to be removed. This was
taken out, busted down and thrown away. I then built the frame for the enclosure,
with the base for the water heater off the ground so that I could run a drain pipe
from the water heater pan to the outside in the event the water heater breaks. I
still haven't run the drain pipe, though..
New Copper Plumbing
The
time had come to complete the plumbing. I planned the whole thing out on paper, and
went and bought all of the supplies. The plan was to run all of the new pipe below
the level of the joists so that I could move around the attic easier, and put planking
down in the attic so it could be used for storage, etc. I carefully measured each
run of pipe, and calculated each elbow and T-junction. I broke the job down into
smaller sections, and pre-fabricated sections in the house. It was during this project
that I really learned how to do sweat fittings with a propane torch. This project
turned the dining room into a workshop for several weeks. As each section was installed,
it was tested for leaks and fixed. At this point, the main line into the house was
removed from the outside and moved inside the walls. In order to get the original
steel pipe out of the wall, I drilled a carefully-measured hole in the roof and was
able to zip the whole pipe out at once. It was way easier than cutting the pipe into
little sections and removing it that way. It's tough to cut through that old
steel pipe! Diane had wanted a water spigot in the back yard for her garden, so
I put that in, too. For this, the pipe had to be run on the outside... But
it's on the back of the house, at least. Oh well.
Enclosure Completed
After
all the pipe was in, we made the big switch of the water heater itself from the outside
to the new inside location. Then I could get most of the pipe off of the ouside of
the wall in that area. Moving the water heater also involved running another section
of gas line, which was done early in the project. It was quite a trick getting the
water heater lifted onto the stand, but Diane and I managed to get it done by ourselves.
Once the water heater was in place and connected, I could finish up the enclosure.
It was drywalled, and I made and installed my own doors; one for the water heater
itself, and another for a small storage area beneath the elevated water heater base.
After more patching and painting, the whole project was finally done! Whew!
Attic
Planking
The new plumbing allowed me to finally use my attic for storage.
After re-routing some wiring, I was able to put down a lot of planking around the
location of the stairs. We keep a lot of junk up there, now. You can never
have too much storage space. I'm constantly adding to the planking; I can envision
a time when the entire attic has a 'floor'! (Not really)
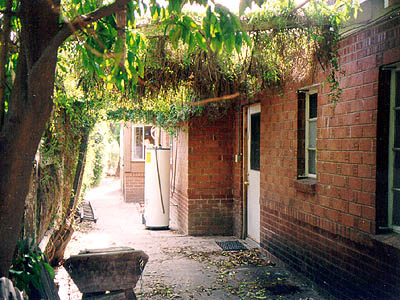
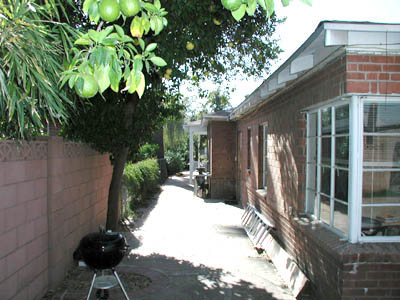
This picture is with this section because of the water heater. This is the before
and after along the back of the house. There's practically no comparison; everything
is changed. There was a lattice from the fence at the edge of the property that
had dense vine growth on it that hung down and kept things generally dark and damp.
You can see where the water heater was, and the Arizona Room was, of course, still
there.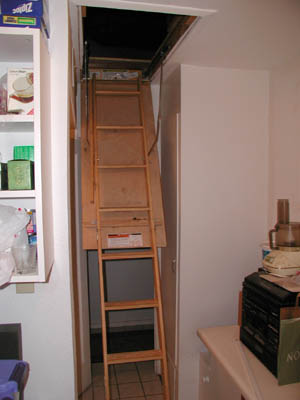
Here are the attic steps that I put in, next to the "new" water heater
enclosure.
The steps fold up to be flush with the ceiling, of course..
While Diane was gone to Charlotte for a conference, I suddenly got motivated to
tear out the old stone and brick barbecue pit from the corner of the yard. The spot
sat empty for a couple of months, then we bought and put up one of those metal shed
kits from Home Depot (HD's good for some stuff). It was a perfect fit, and
there was already a solid, level surface for it to be anchored to. We also put up
a shelf kit for the inside of the shed. Now that we have it installed and filled
with stuff, it's hard to imagine how we got along without it!
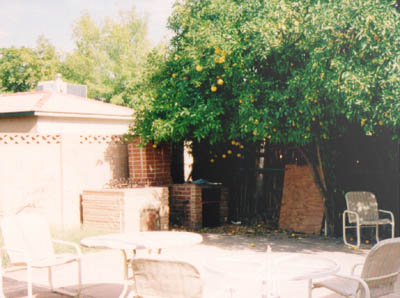
This is a shot of the barbecue pit when I moved in. It was a very solid brick
and stone monstrosity. It was probably very nice once upon a time, but I would never
use it. Part of the reason I wouldn't use it, is that it would be a fire hazard,
with the trees overhanging it so much! The pit areas were full of garbage from the
previous owners, and I never even bothered cleaning it out until I demolished it.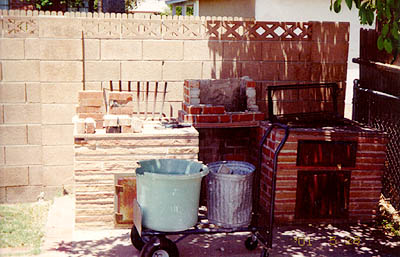
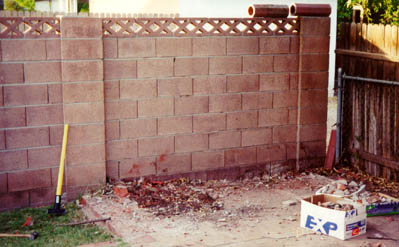
Some pictures in the middle of and immediately following demolition...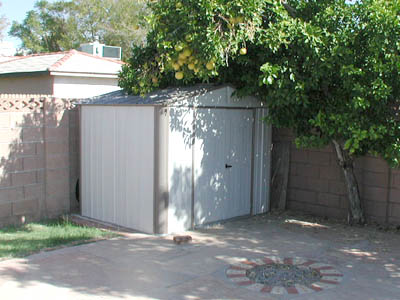
And now there's a shed there! Which is much more useful and practical..